|
|
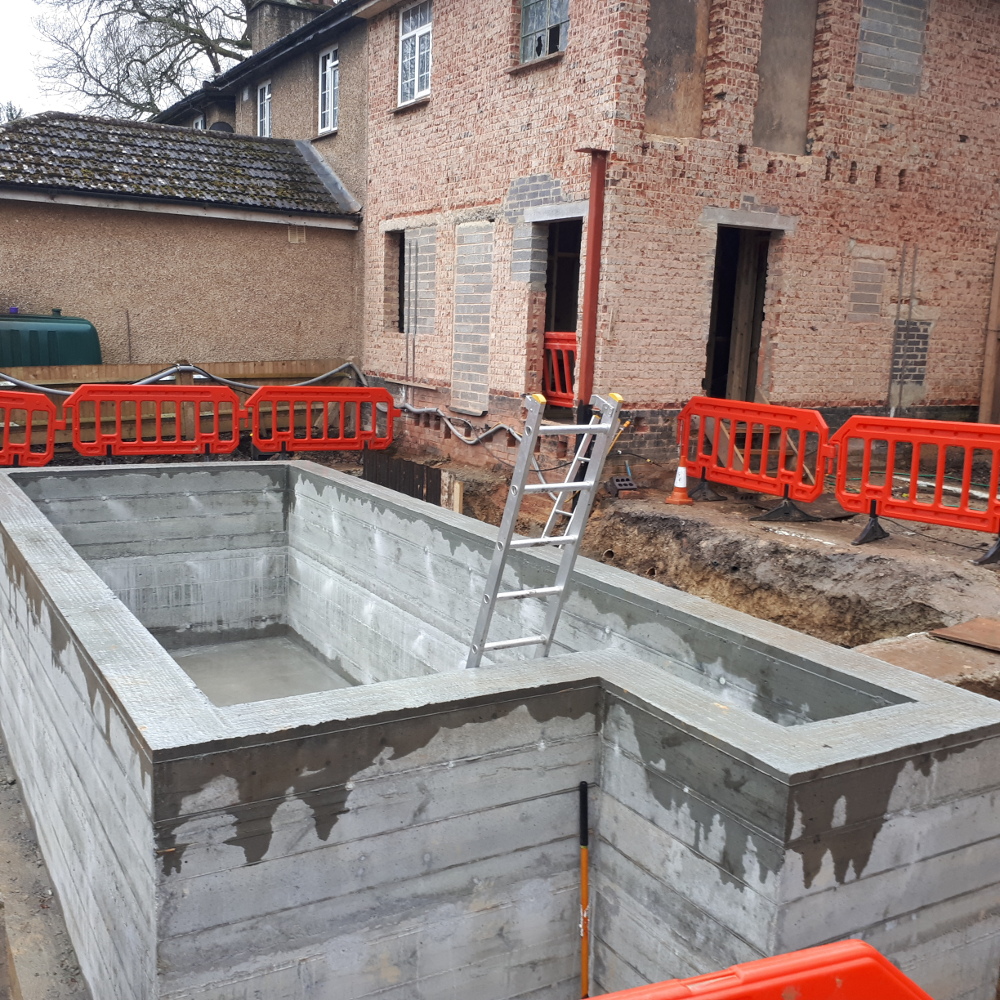
Basement formwork manual
This is my basement formwork manual.
Although my statement in the graphic above is only my opinion, I cannot over-emphasise how strongly I hold that opinion.
My aims are
-
No obstructions along the top so that when you concrete you can keep the pipe just inside instead of lifting it out spewing concrete everywhere.
-
All thick timber that can be screwed to easily and securely.
-
No kickers, because they leak.
-
Nothing in joints except clean concrete the new concrete will bond to.
|
|
|
-
Screwfix turbo coach screws everywhere so that you strike the formwork easily and quickly without damaging the timber any further.
-
Walls formed and filled in two goes so that you get concrete right to the bottom in good condition and compact right to the bottom properly both times.
-
Timber sold on or used again in your new house.
ONE.
Somehow you need to mark out your wall corners accurately.
You might have profile boards set up or you could employ engineering surveyors with survey instruments and maths.
Survey instruments and maths are equally accurate if it is windy. Profile boards and string are much less accurate, especially if it is windy.
Measure from these to set a string line from corner to corner inside STEPPED BACK by the thickness of your formwork face board PLUS the thickness of the front of your L shaped uprights.
In this way, the string is set correctly for the timber floor plates you fix down first.

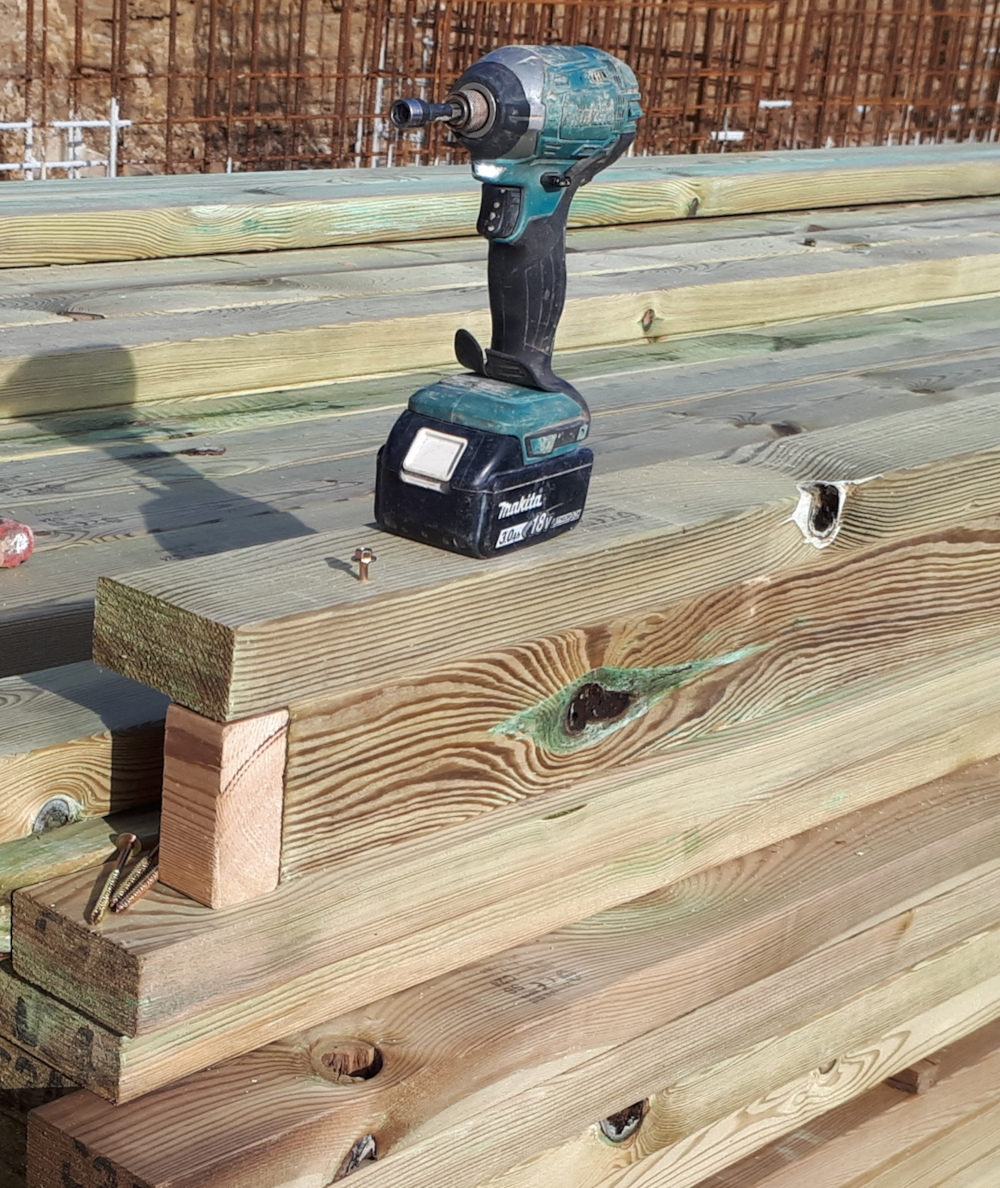
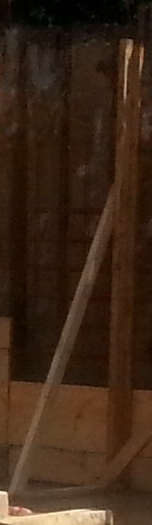
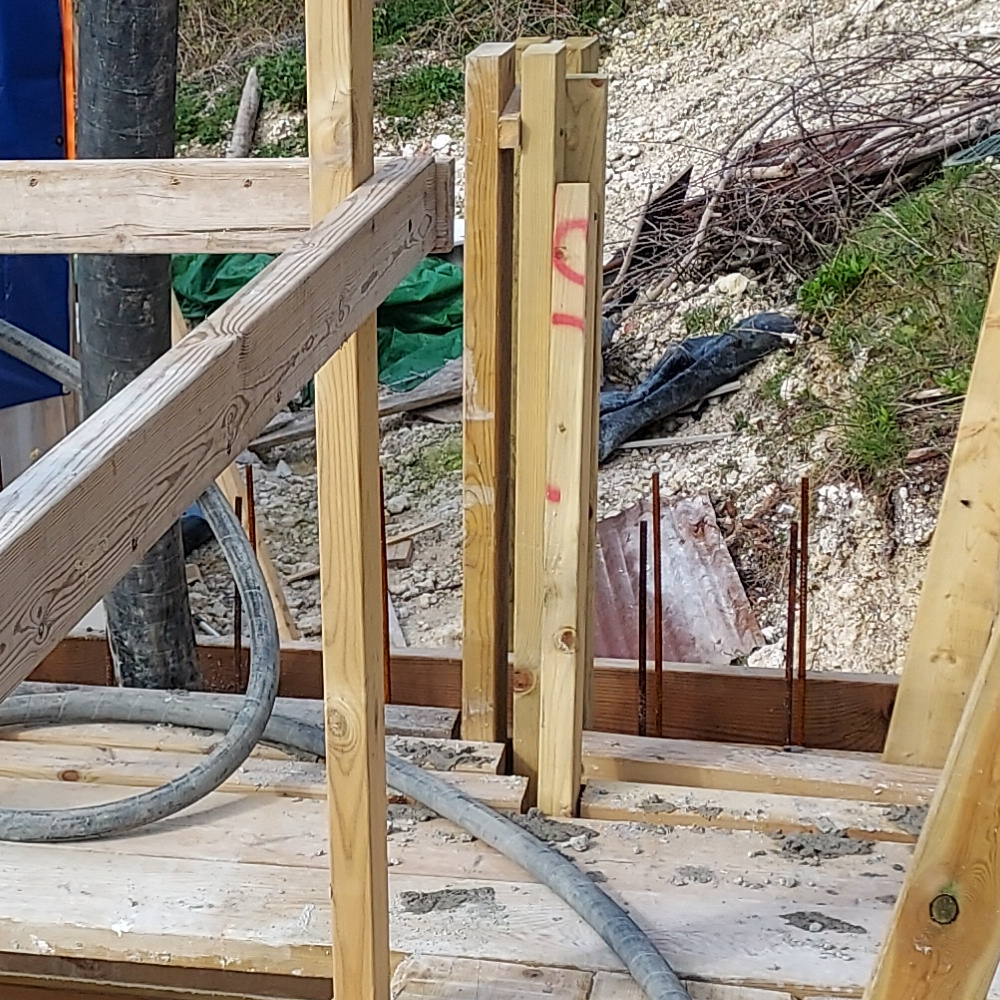
I cut about 2m off a length of 4x2 cutting at an angle. The angle allows a firmer fixing when this end becomes the bottom of the diagonal brace, as you can see in the image above. I set this 2m length aside and use the 1000mm plus offcut as the floor plate. I fix the floor plates down in 3 places, as indicated.
We had failures in the early days where the plug was too deep and not much screw was firmly held. Therefore, I developed a standard way that works.
I drill an 8mm hole through the timber into the concrete. I put in a brown plug. Using my 4" 6mm diameter wood screw (Screwfix Gold Screw code 16784, not the Silver or the Gold Plus), I hammer the plug down to the bottom. I use my impact to unscrew it out. I bang a second plug down into the hole and this time I drive the screw home fully with the impact driver.
These should be a maximum of 2m apart. But they might be closer if the scaffold timber you will walk on needs to be supported more often. Or on 1m max. centres if you use an L shape as one of your soldiers. See below.
Two.
I make my L shaped uprights.
Two lengths of 4x2 at least as long as the wall formwork will be high. I use an offcut to offset the two ends the thickness of the floor plate, and I screw them together with 4 no. Screwfix 90mm turbo coach screws (Screwfix codes 46700 and 2793X for the larger pack).
These screw heads need to be buried flush because the formwork boards need to be tight against them.
The reason I favour these Screwfix screws over any other brands I have tried, is the washers are that little bit bigger and they are easier to get out again. Even when they are deliberately buried.
These L shaped uprights should be on 1m centres IF they double up as soldiers. If they weren't doubling up as soldiers they could be up to 2m apart. But not so far apart your scaffold wouldn't be as good as you want it to be. You need to be thinking ahead, which becomes easier after the first stretch of wall.
You need to be a little more aware of what you are building to save timber in this way and not get in a pickle.
You need braces fairly close to corners but without the diagonals clashing. You don't want them in the way of rods either.
It will be worthwhile reading these instructions a few times, at least until Four because there is a lot going on at once.
|
|
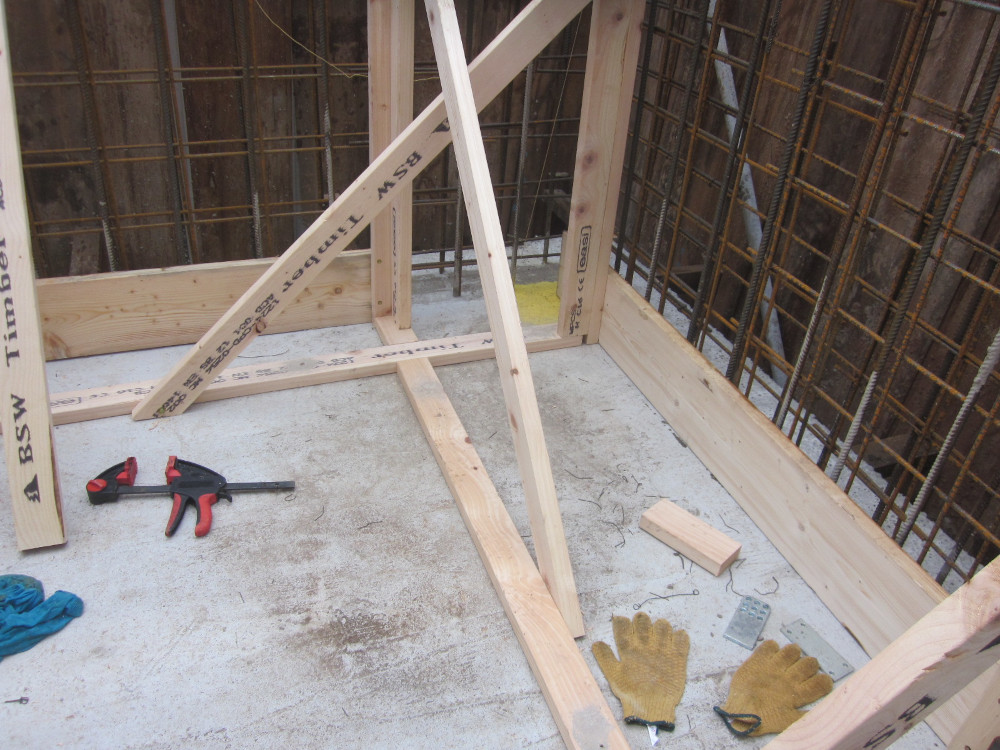
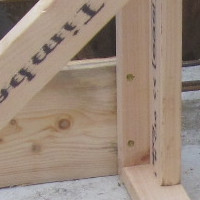
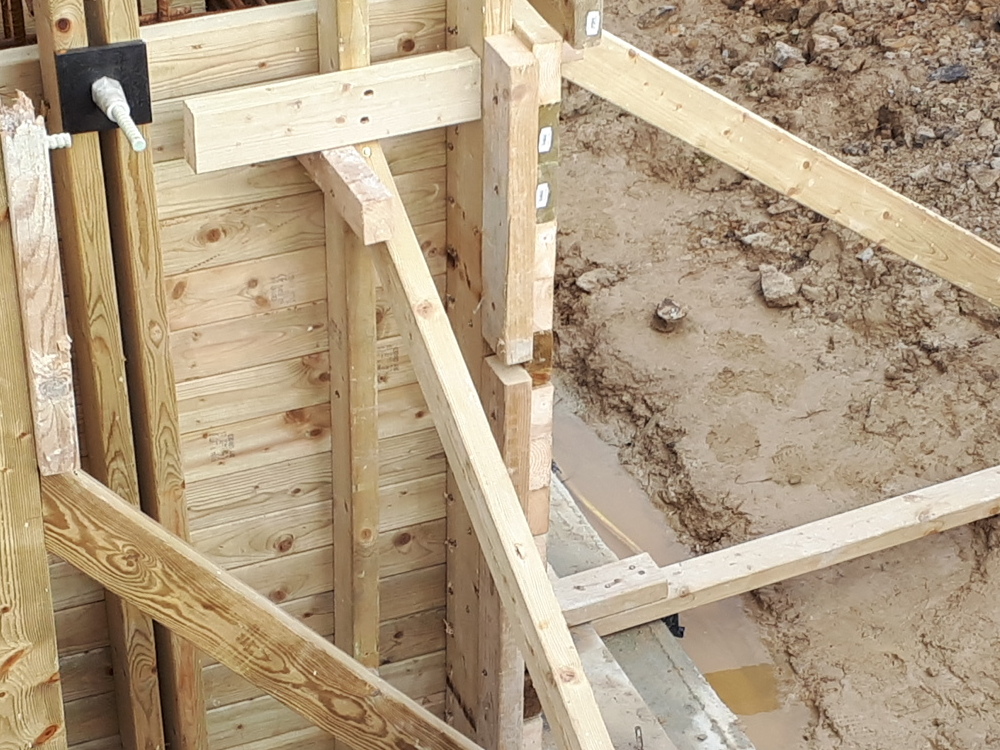
Just the triangle brace.
You might use a bit of tying wire hand tied to the mesh behind to hold it fairly plumb until you have a couple of courses of boards completed.
Triangle braces are only inside. Nothing similar outside.
The diagonal is fixed top and bottom with 90mm turbo coach screws using a spirit level to fix the L shaped upright perfectly plumb. Don't fix the diagonal where it will be in the way of boards later.
The FRP threaded rods should be on 1m centres max if your boards are scaffold boards. 1100mm max if your boards are 6x2.
At corners you don't want to find you cannot get plates or nuts on where rods hit each other. Start one side of the corner about 600mm away and the other side 800mm away. Any difficulty, just put a couple of rods closer together.
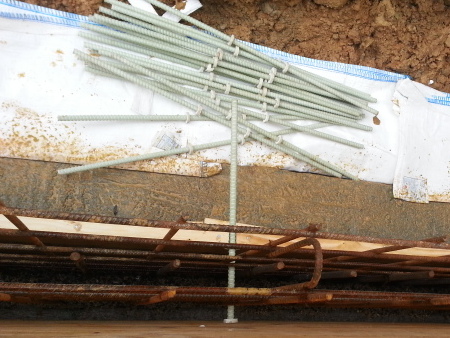
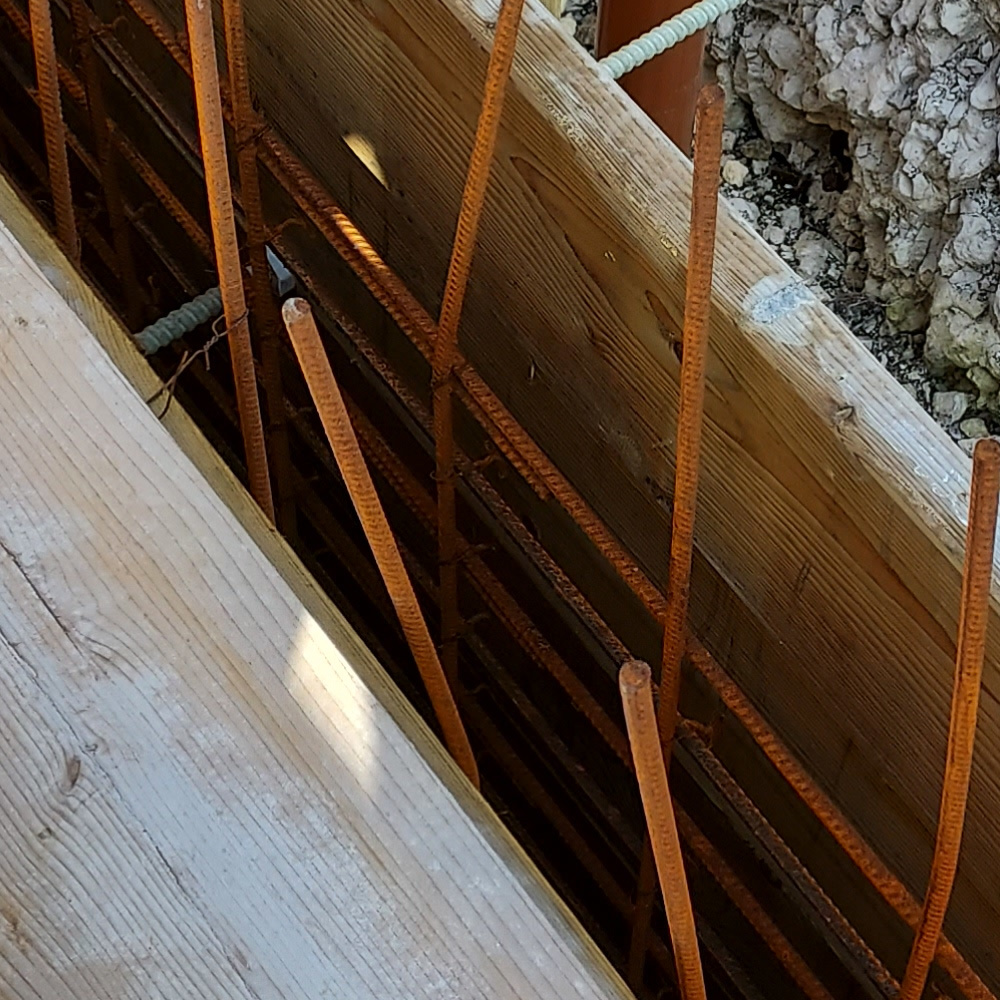
You need something to stitch the ends of boards together or else they could spread when concrete goes in. Many variations work. Martin, two images above, put rods through his stitching timber which no one ever did before or since. Use 18mm ply or 6x2 but don't use any timber already splitting.
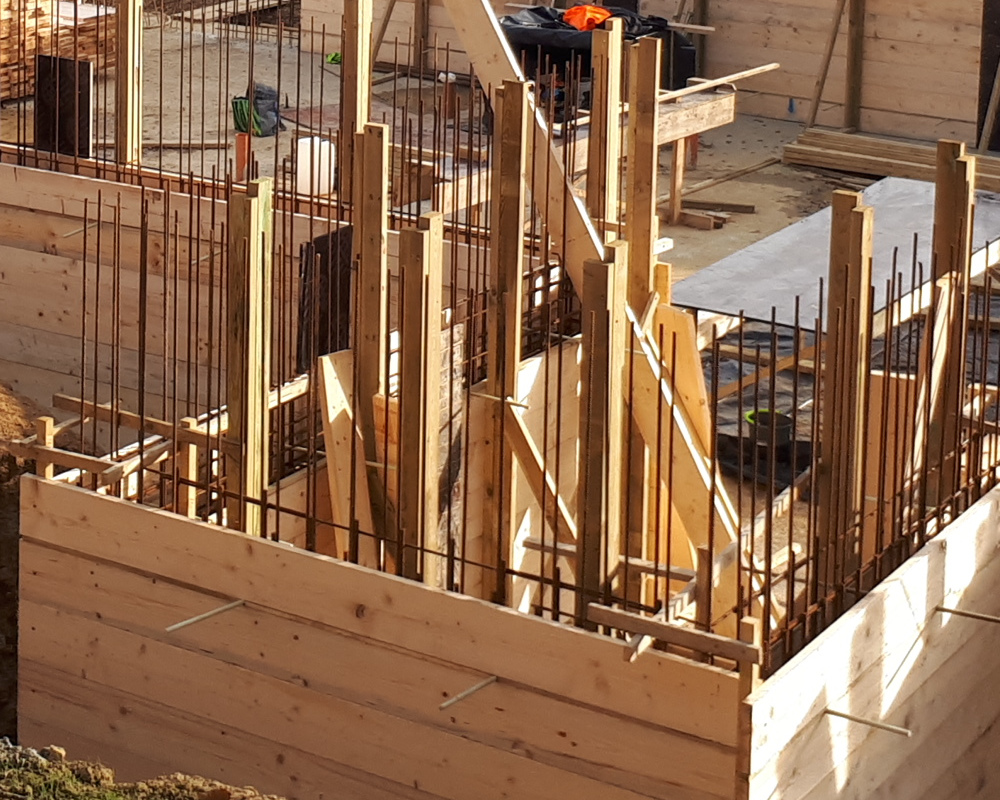
I am just going to jump ahead so you can picture what your formwork is going to look like.
You might decide that the stitching can be started now fixing them to your first row of boards both inside and out. Your stitching might be temporarily held plumb somehow. Getting corners and stitching plumb can all help speed up fixing more rows of boards.
|
In the image below, Ian went full belt and braces. He didn't have to but obviously he had no failure.
He used old scaffold board to stitch. But old scaffold boards are prone to splitting. He also added two rows of scaffold boards like strap banding around a pallet.
But what he should not have done was have those pieces of batten connecting the pairs of soldiers over the top of the wall, because now the concrete pump and poker both need lifting out of the form to move along. More work and more mess.
If you find them handy while you are putting it together, then fine. But remove them before the concrete arrives.
If I find it necessary to push the two side apart at the top, I would cut a bit of timber the correct length to match the width, put a nail in each end so that after I force it in and after the first or second load push the sides a couple of mm apart and that bit of wood comes loose, it hasn't fallen in and whoever is on the pump can throw it outside as they come round.
Three.
Back to real time. What you will do next.
You have your triangle braces all set up.
You start inside with one board at one corner, then continue along the wall till that wall has one course complete inside. The next board in the adjacent wall might need to butt against or be butted against. Corners are critical.
Fix the first course of boards inside with 2 no. 70mm Screwfix turbo coach screws into each upright brace. (Screwfix codes 22717 and 4956X for the larger pack).
Next you need to place your rods.
|
|
|
You can place your rods loose on the first board to see all looks well.
Cut 38mm x 19mm roof batten into 980mm lengths between rods and measure and cut the batten between rods and corners. Screw batten down with 40mm long wood screws. Thin screws split the batten less. 2 screws each piece.
Now you can put your first course of boards outside.
It is worth cutting 8mm off some FRP nuts and screwing them on the bottom course of rods and adjusting them to give you the correct thickness of concrete. Use a diamond blade. Don't breath in the dust.
I have to confess that these FRP rods and nuts are not originally made for formwork. They are meant to never come undone. They lock after the big nut slides along the tapered thread 2mm or so, after the load is applied. Therefore, with your inside boards fixed to braces, fix your outside boards 5mm nearer than the dimension the wall thickness should be. If you forget your wall will be 5mm thicker.

|
|
Corners will be made strong with 2x2 or 4x2 screwed both ways into boards.
With only one course of boards and the first course of batten and rods down so far, now is the time to start those corner uprights.
Before you go any further, screw 2x2 or 4x2 both ways into your first course of boards outside and inside corners. Use anything and screw to anything to fix all these posts perfectly plumb and in the right position.
This will pay dividends many times over compared to taking corners down and putting them up again because they went out of shape.
Make sure everyone is carefully fixing each course so corners are perfectly plumb and correct.
As you progress you will be able to take some of the support off the posts because 6 or 7 courses of board will hold them true - unless your posts are twisting.
If the posts don't reach the top just add some more post when you need to. When the formwork is built they make corners strong. They won't be holding anything plumb anymore.
|
The same bit of wall.
Four.
All the hard to understand stuff is finished. Only the hard work lugging boards around now.
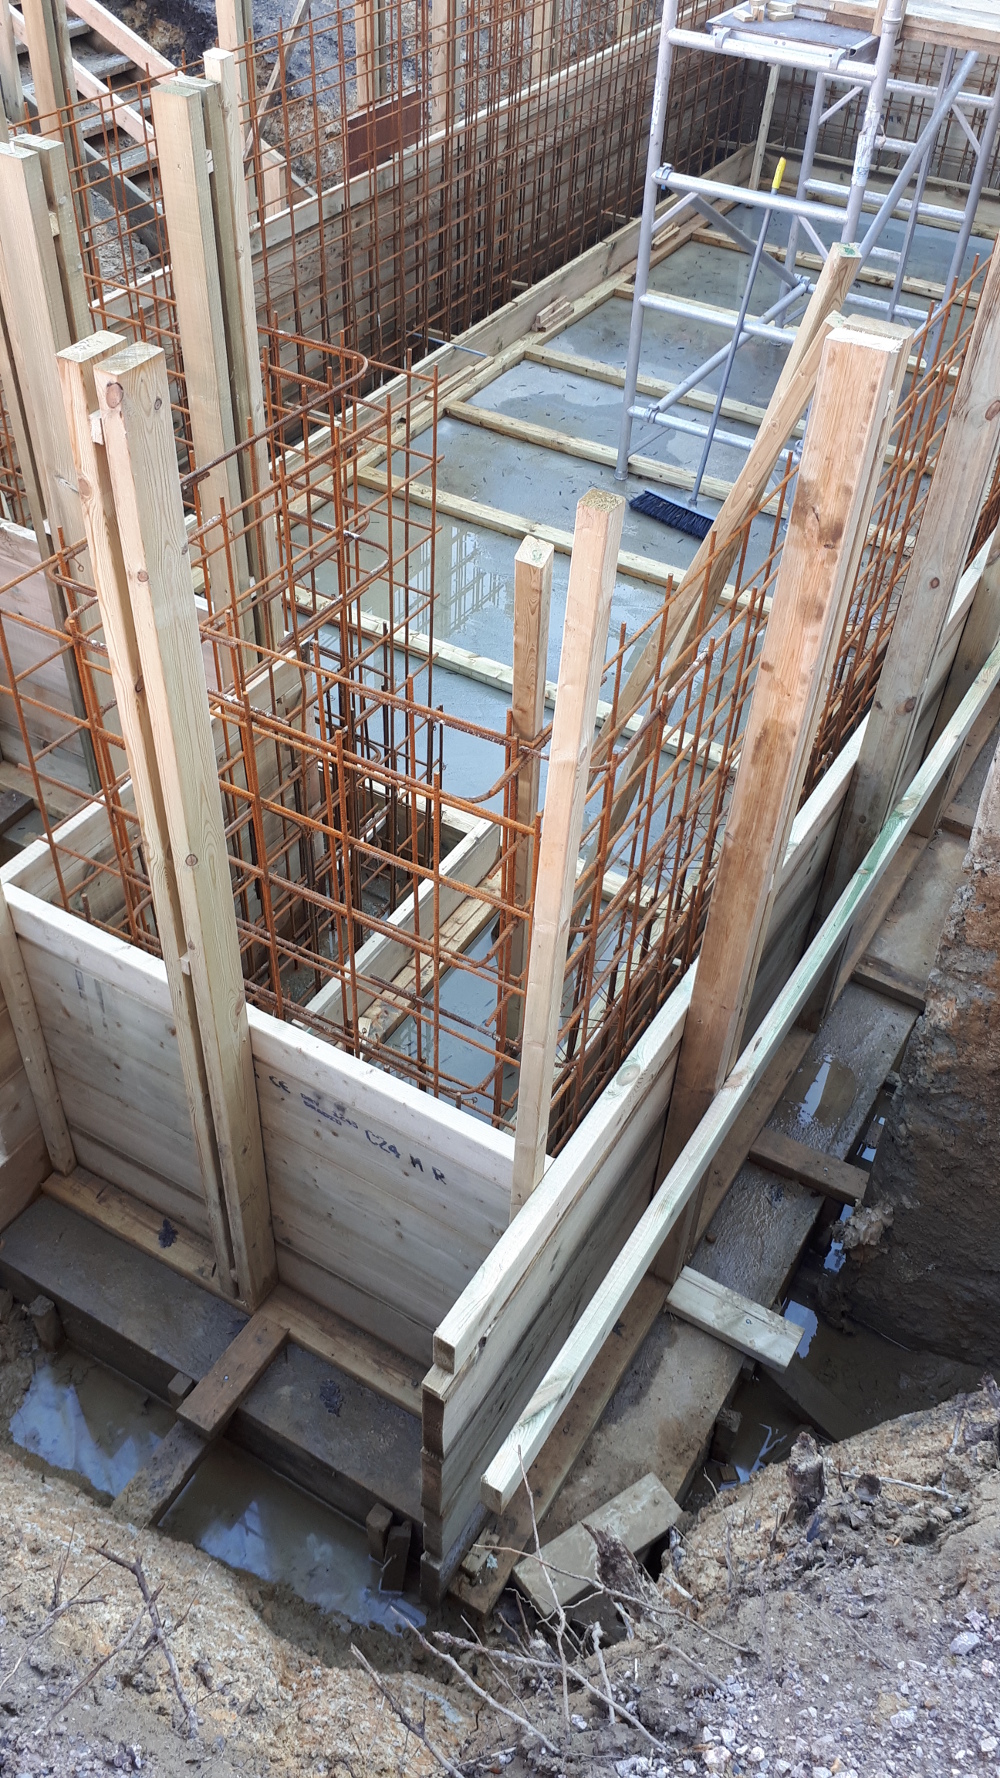
I tend to use A393 flying mesh in the walls. It is neat and tidy when adding more mesh after the first pour.
The top horizontal bar is 1900mm above the floor slab and just covering this bar would be my maximum first concrete pour height. It leaves enough vertical bar sticking up to overlap the next mesh 400mm and to add another horizontal bar 2000mm from the floor if required to control thermal cracking.
I would like to see your second row of rods at least one board down from what will be top of pour of first wall concrete.
But even if you are filling 2000mm high concrete you really should not need a third row of rods mid way up. As long as your soldiers in pairs are going to be strong enough, which 6x2s will be, two rows of rods are enough for the first pour.
Five.
At some point you find convenient, you need to add your soldiers both sides in pairs with the rods in between.
I would probably finish the formwork then add the soldiers next.
It helps if soldiers have a screw fixing each pair together but with a gap wider than the rod. You can do this easily with one 90mm screw once you get the hang of it. Or use a spacer block. Screw these between your two rods, not above or below.
Sometimes we put a block under the soldiers, particularly if we were pouring a total of 3.1m high and our soldiers were only 3m long.
Note so far.
No obstructions along the top.
One. You can swing the concrete pump pipe between the faces of steel through the top without having to lift it out which would make a mess.
Two. The poker can be swung along between the steel as well, meaning much less lifting in and out. If your poker man were to get tired his getting all the air out would not be as thorough. It is well worth making his job easier.
If the formwork is slightly higher than the first pour level that prevents a lot of mess as well.
At a point to suit you, stop the wall formwork and complete your scaffold making use of the triangle braces. The most important thing are hand rails. But in the photo after next they have joists to prevent a fall.
If you put your soldiers up before your scaffold, your soldiers might become part of your scaffold as well.
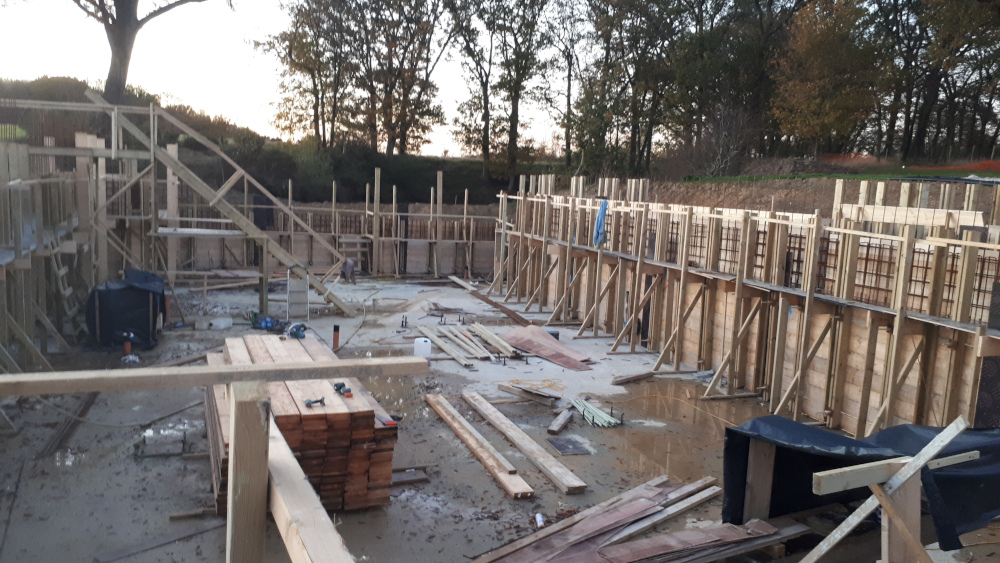
Good scaffold is wide enough for the men to move around, pass each other and poker safely. Strong enough, obviously. Fixed well enough. You don't want men dropping an inch and getting frightened while they are busy concreting.
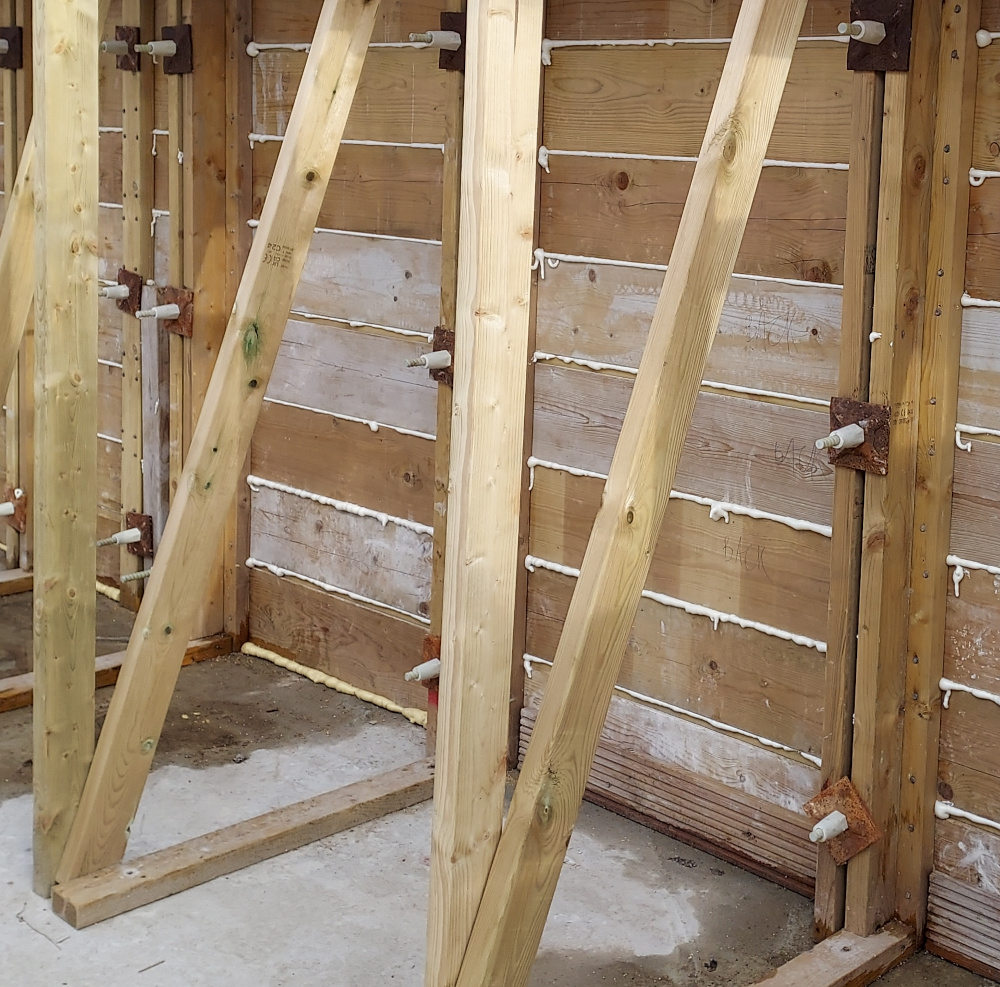
In this next image, you can see how high they filled the first pour and that they loosened all the nuts to lift up the soldiers.
They needed to use two nuts, instead of one, to be sure they could unscrew all the nuts and tighten them up again.
I notice that to help form his upstand at the top he used bits of timber over the top that would have got in the way when he trowelled off the top to the right level. Probably avoidable.
He made one mistake, as it turned out, it wasn't something I had experimented with. He put the first row of rods two boards up. The first concrete pushed the bottom boards out which had the effect of pulling the higher boards in. As the wall got filled the top boards were pushed out again but this was bending all the timber. He got away with it, luckily, but the first row of rods must be only one board up.
This client bought loads of timber in packs from the docks, just like timber merchants do.
When he sold smaller quantities to people who compared his price to that the timber merchants were quoting them, he got back what he paid despite a few screw holes.
You might avoid cutting some standard lengths of timber. You might want to make corners even stronger.
What I advise higher up has always been sufficient.
Nevertheless. You don't know how strong the formwork needs to be. You only find out the hard way if it wasn't strong enough. If you screw on more timber than I would and it helps you sleep the night before - fine.
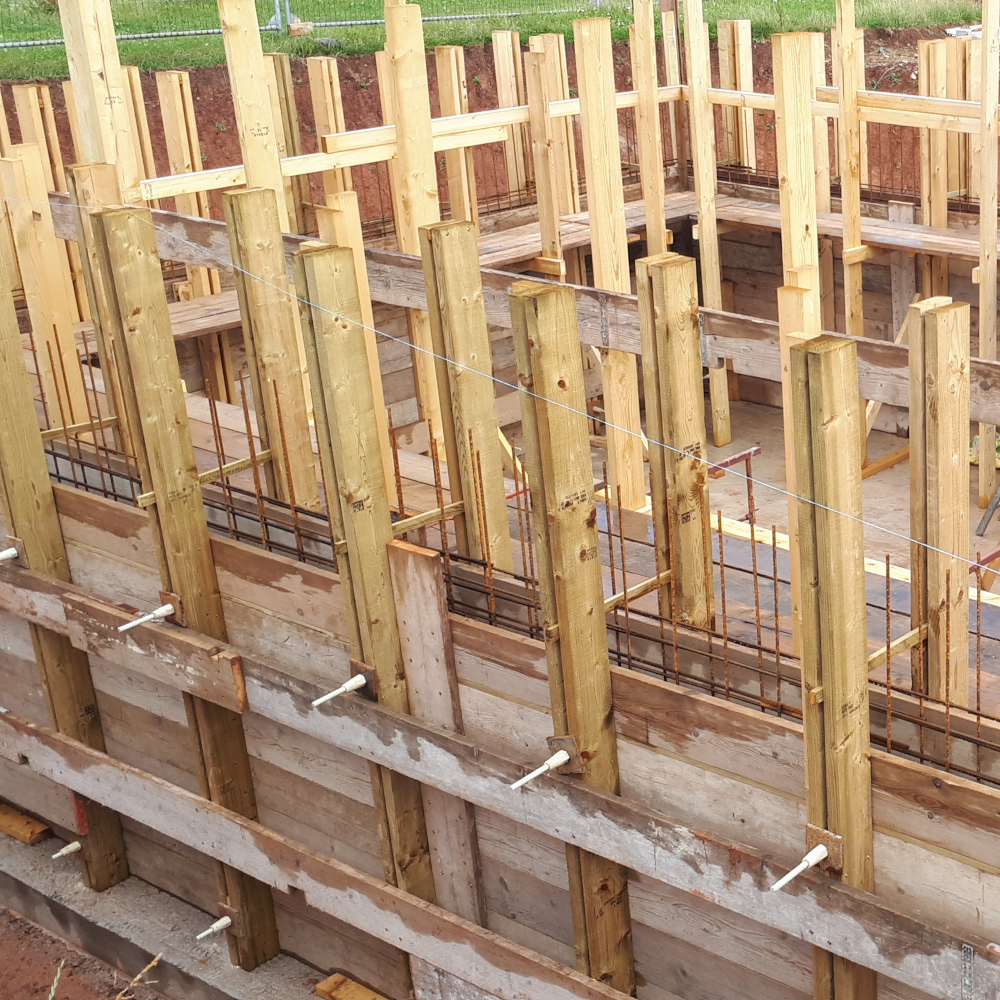
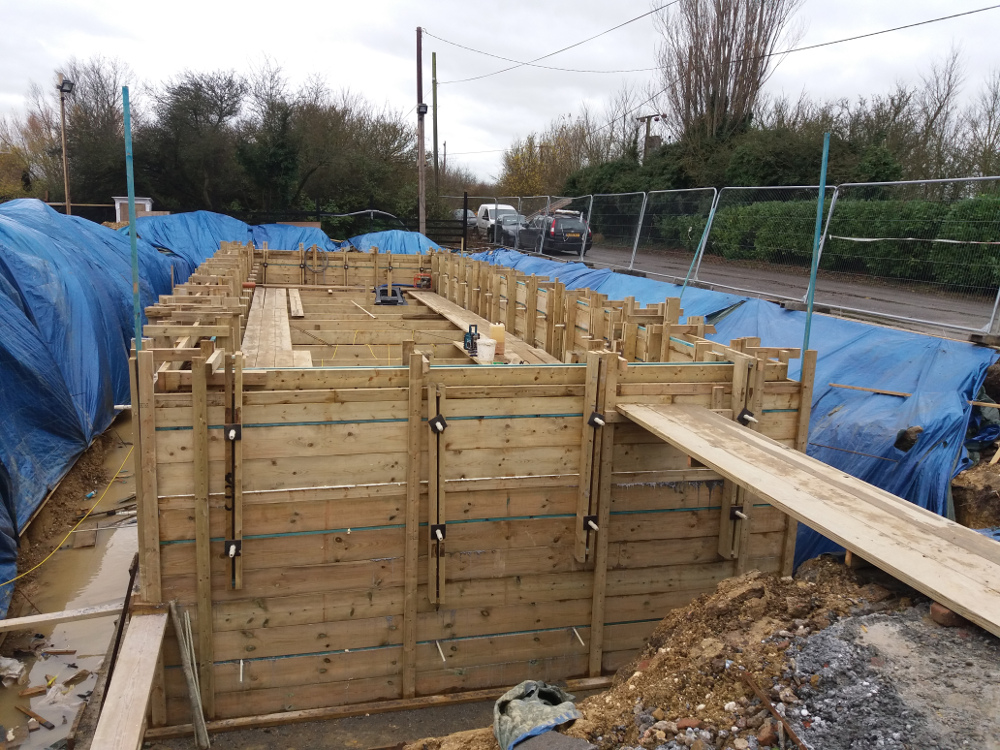
This building firm saw a self builder's basement I had helped with. They then studied these web pages then placed their order. I took this photo when I delivered the FRP threaded rods and nuts. They weren't there. I never met them.
They have spaced the formwork with measured pieces of wood. I imagine that these came out as they put in the threaded rods with thin nuts to control the width instead.
The 6x2 screwed down against the bottom boards is not necessary to stop the wall getting wider under the weight of concrete because the rods, nuts and soldiers do that.
However they have a benefit stopping wet concrete escape if there is a gap under the bottom board.
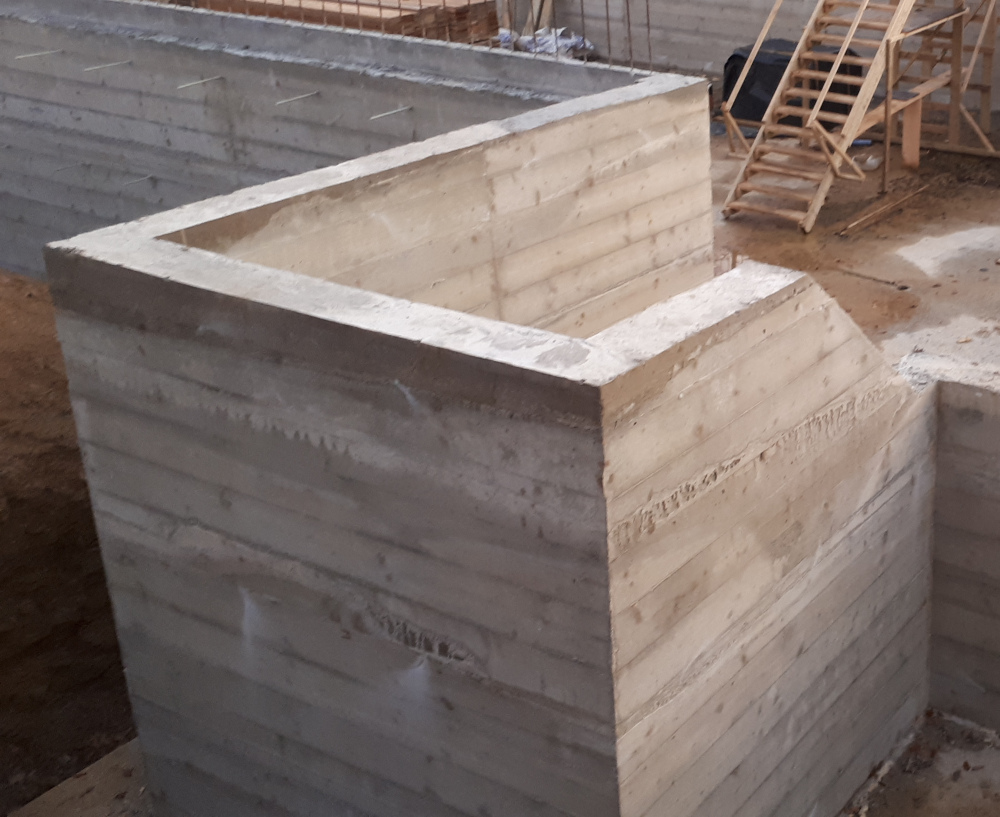
3 weeks later I collected the steel waler plates they hired. This is the completed job.
If you want more explanation than you found on this page please use the "answer all your emails" service by paying for it.
Bespoke formwork design is by quotation only.
Back to the Basement Building Questions Answered menu.
|
Back to the Basement Building Construction Manual menu.
|
For a fixed fee of £199 I will answer all your questions by email. More details here.

|
|
|
|